Part 0 - Setting Up
Part 1 - Fundamentals
- 4 - Our Project
- 5 - Fragment and ViewModel
- 6 - Functions
- 7 - Recycler Views
- 8 - Wiring up with Kotlin
- 9 - ViewHolders
- 10 - Retrofit
- 11 - Connecting Rx
Part 2 - User Interface
Useful Links
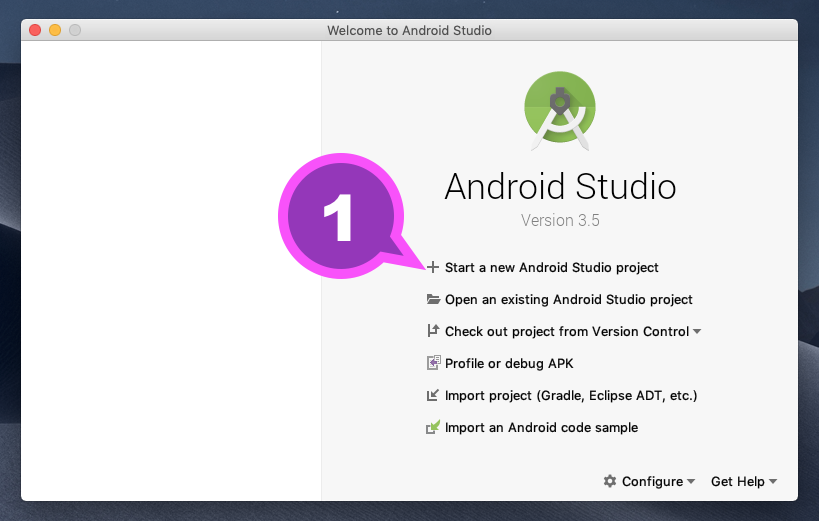
Step 1 - Create a Project
OK, you now have a functioning setup. Let’s take it for a spin.
Just to check your Android Studio setup actually worked and to get started on learning to navigate Android projects we’ll create a project.
- You can use the steps on Googles Starter Codelab if you prefer more terse instructions.
- These instructions are also available as a set of Google Slides that you can tap through on your mobile device.
Creating An Android Project
Follow this walk-through to get the paint-by-numbers version of how to create the project.
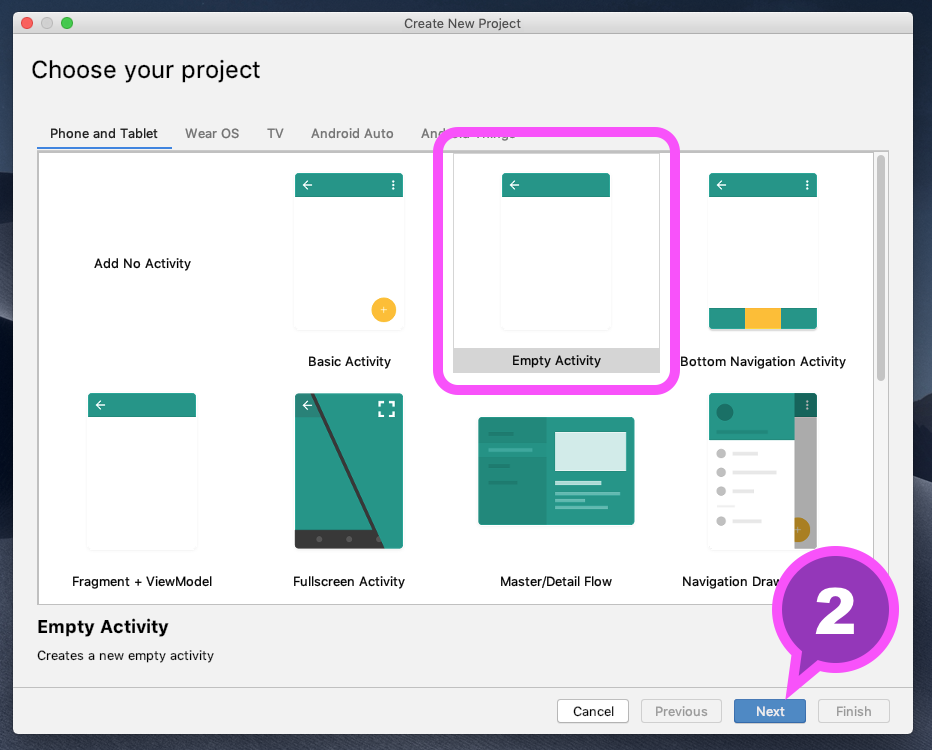
We’ll use an empty activity for this. It just shows a basic nav bar & an empty activity with a label saying “Hello World”.
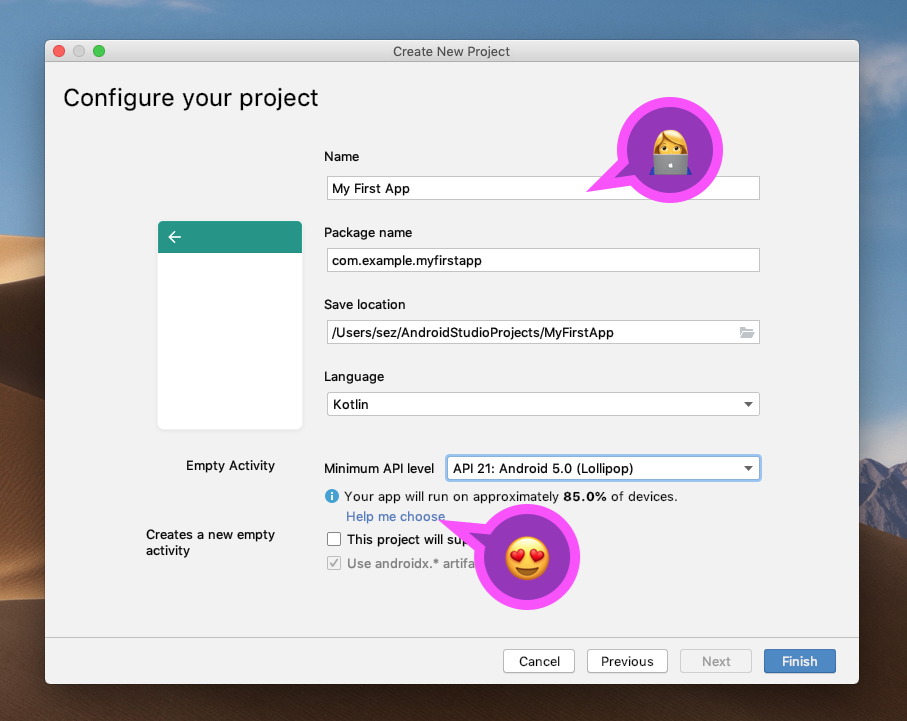
There’s some points to note on this project configuration screen. Usually you want some care for what user visible name you type in the first box: it will appear on the phone’s launcher so should be concise.
Project Details
Type in the values below - at this point it doesn’t matter too much what you call this project.
Package name
The package name has a number of impacts on your project: it will become the unique identifier for your app if it goes into the Google Play Store. Lots of other services such as analytics will also use this to identify your app as its in production.
Usually it has to be unique - eg a reverse FQDN. For now just type something.
Kotlin
Make sure you set the language to Kotlin as that’s what we’ll be using in this course.
Android Fragmentation
When you build an app choosing the minSDK level or Minimum API level for the app
always worries new developers. After all, this is what will dictate what user
devices your app supports and is available to in the store.
Welcome to Android fragmentation!
I love the Help me choose diagram which shows a graphical breakdown of fragmentation - click through this link & explore the percentages. How do you decide?
I suggest forgetting about the supposed percentage of devices and think about your actual customers - the people who will be likely to use your app. The Android devices that are “out there” may not all be in active use by people who are visiting the play store to download your app and drive engagement or revenue (if your app is a paying app). Is it worth the massive compromises & costs of supporting old devices if they rarely connect to the web any more?
Remember: if you try to support older devices that may mean denying your customers who do have new powerful phones & the latest Android version, access to the features that they expect in a new app.
Waiting for Gradle
After you click Finish Android Studio creates your app. Much of the processing you’ll now see comes from Anroid’s dependency management & build system Gradle which processes all the gradle configuration, fetches needed files, compiles dependencies and indexes all the source code so it can display the syntax highlighted, parsed version of the app to you.
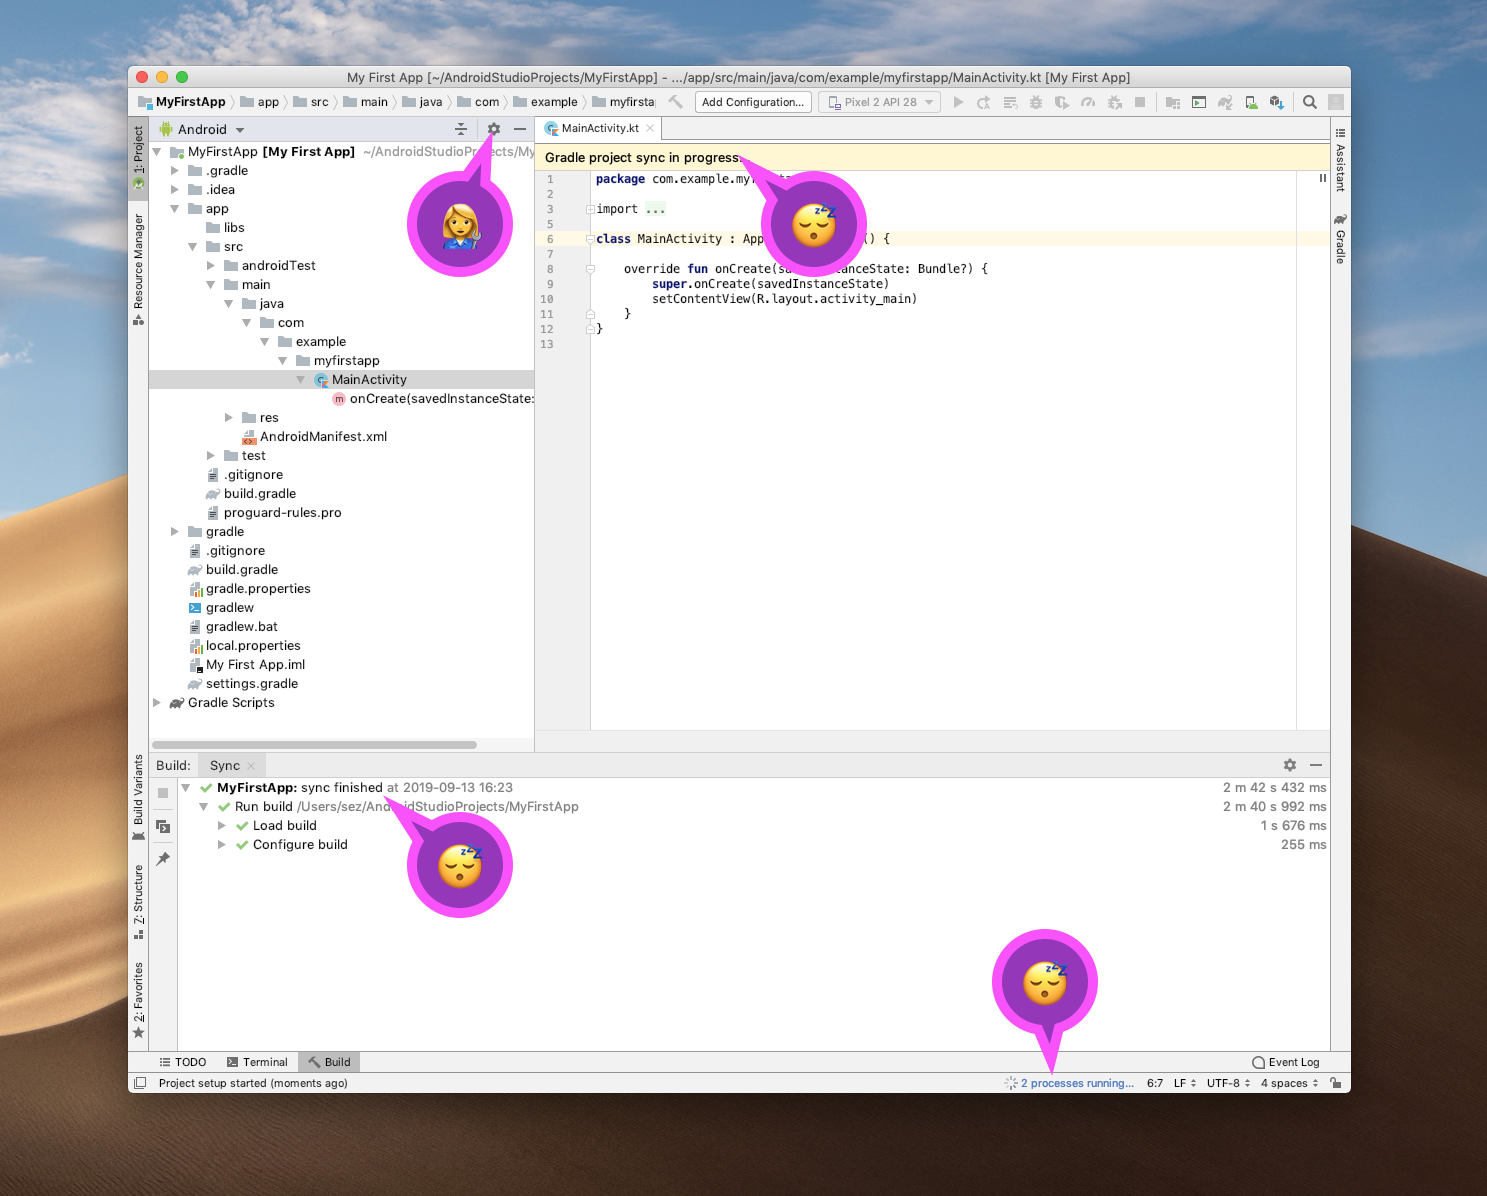
You can see this processing occurring in the progress bar at the bottom of the page. You can click on that bar and stop the processes if you want, but gradle will complain.
The components of the sync & build are displayed in the panel at the bottom quadrant of Android Studio. You can expand these to see what makes up the process. With Kotlin there’s much processing of the intermediate files that you can largely ignore.
Parts of the IDE
After you’ve created the project and the code is displaying Android Studio will grind its gears for quite a while as beneath the surface all its tooling processes the code and gets it ready for display in the IDE.
During this time gradle is hard at work satisfying dependencies and you’ll see around the IDE a number of indicators of progress bars & network downloads.
You’ll need to wait for this to conclude before doing much with your new project.
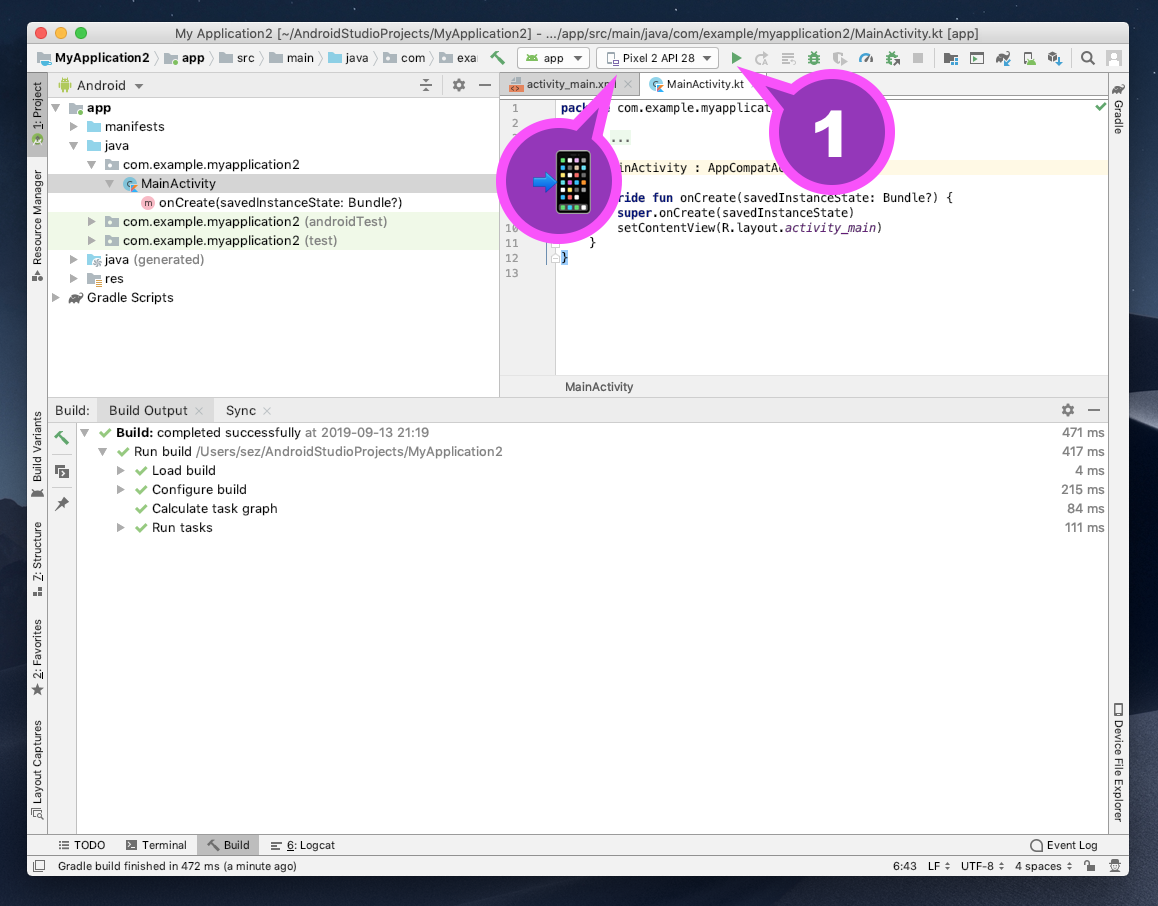
Use this time to explore the project, and a good starting place is the navigation pane which is controlled by the settings item indicated.
Right click on a tab and select “Split Vertically” to have side-by-side windows.
Setup Some Code Navigation Helpers
There’s some obscure but powerful features hidden in the preferences cog-wheel above the project navigation window.
Try having the following items in the Android view of the project navigator ticked and then select different sources & items in the project to see:
- Show Members
- Autoscroll to Source
- Autoscroll from Source
- Compact Directories
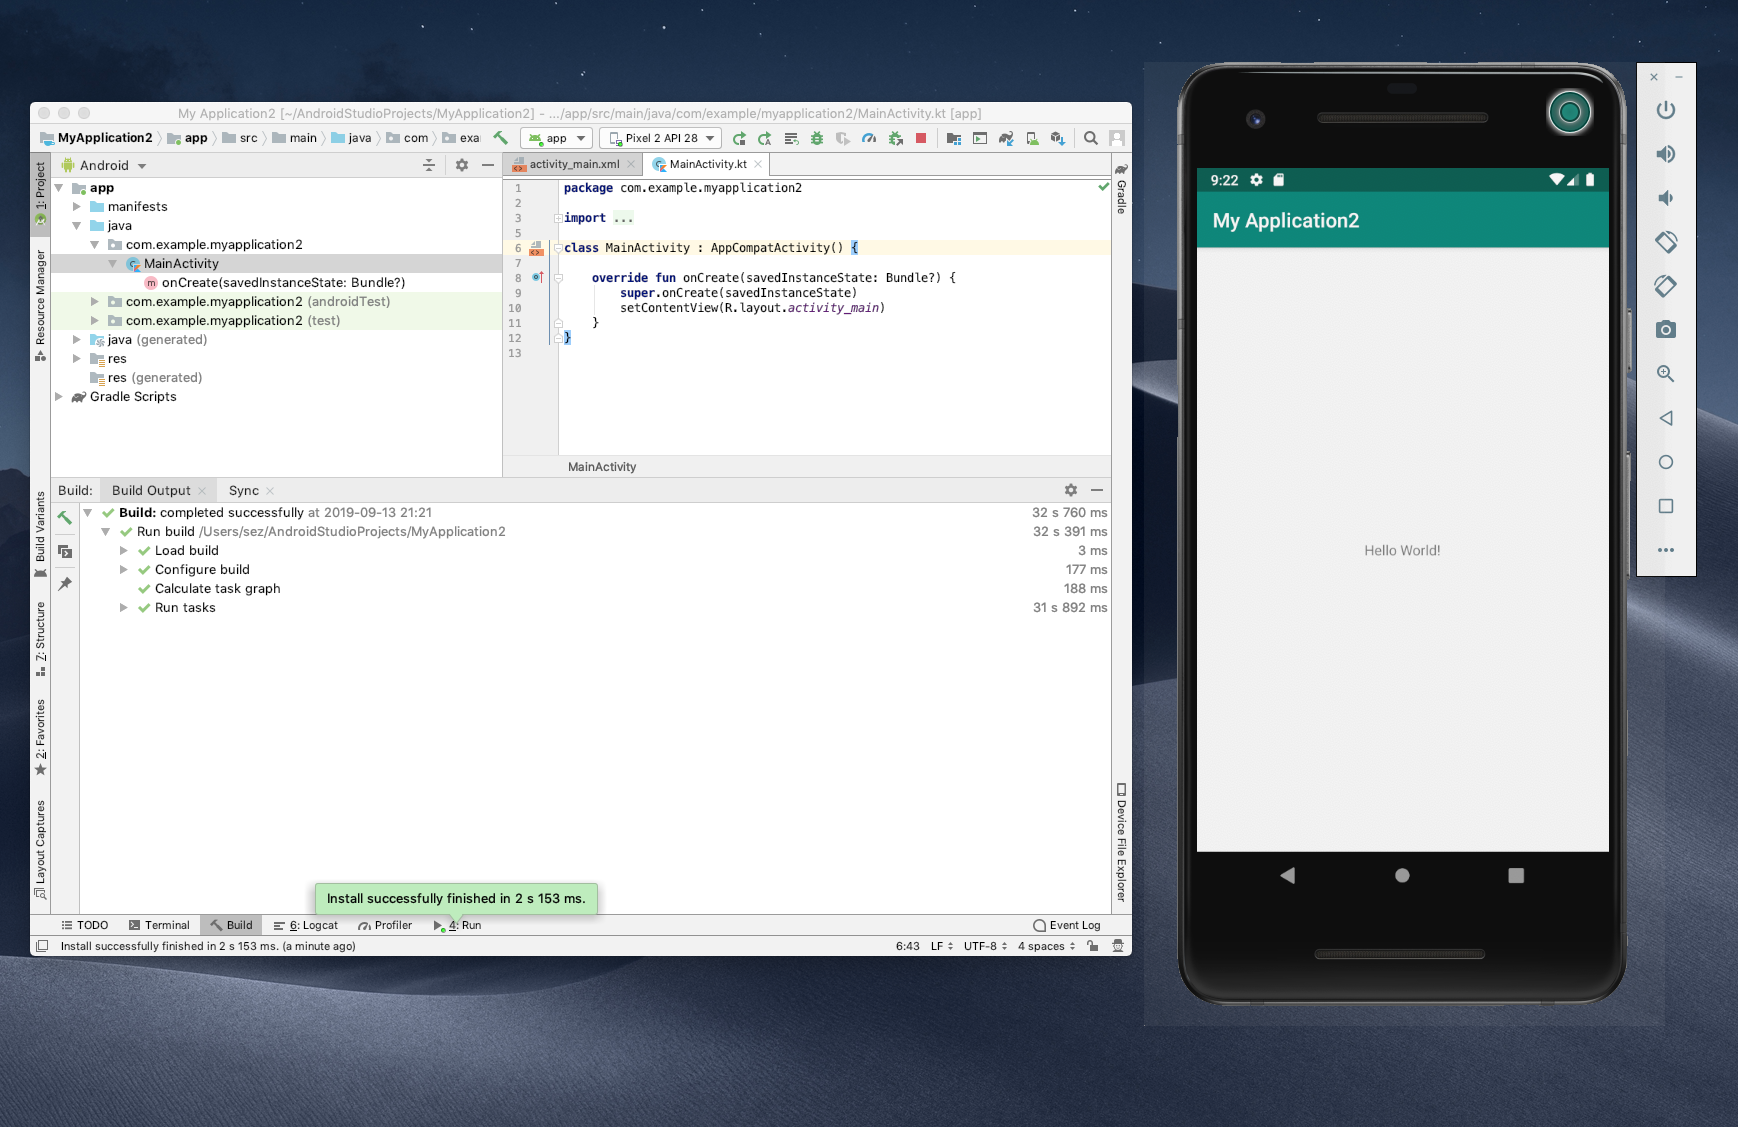
Run your Project
If you’ve completed the previous steps to create an AVD then your device will be displayed in the drop-down above. Select it and then click the green “play” button to run your new project:
The AVD should launch and show the AVD. Try resizing the AVD window & explore the soft control buttons and settings.
Emulator and IDE
Now you have the project running try using the AVD. Check out its browser and also the Android settings app.
Command Line
After you have run the project, your command line tools should be available. This is what you set up in the section on the Terminal.
Make sure you only have the one AVD (emulator) running, and do not have a development phone plugged into your laptop, then run the following:
adb shell am start -a android.intent.action.VIEW -d http://www.stackoverflow.com
This will cause the emulator to fire up Chrome and browse to Stack Overflow!